Skylight Installation in Chicago, IL
Chicago Roofing Team installs fixed and vented skylights to bring natural light into homes while protecting your roof against harsh Chicago weather. A properly installed skylight adds daylighting to dark spaces without the energy loss of windows—when the flashing, underlayment, and sealant are done right. Call us at 312-313-3253 for a free skylight estimate.
Call 3123133253What Is Skylight Installation?
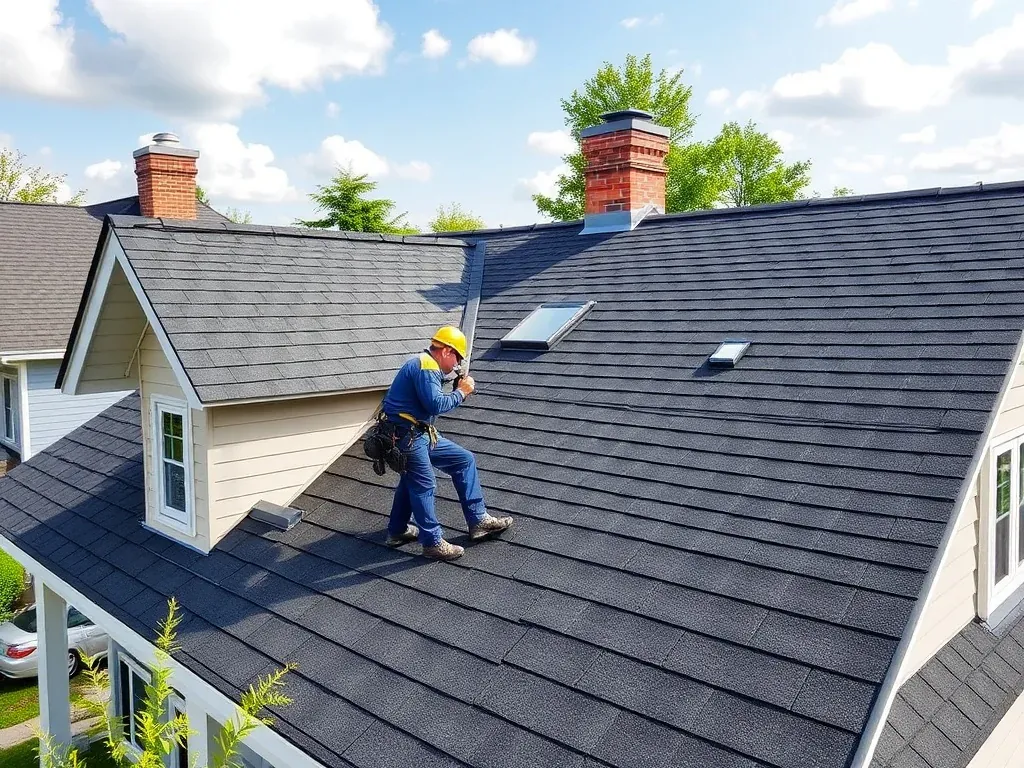
A skylight is a roof-mounted window that brings natural daylight into your home without sacrificing weatherproofing. Installation requires creating an opening in your roof deck and sheathing, then securing a frame with proper flashing to keep water out.
The weak point on most Chicago roofs is where the skylight meets surrounding asphalt or architectural shingles. Step flashing and counter-flashing direct water away from the opening. We offer fixed skylights (stationary glass) and vented skylights (motorized operable units with solar-powered blinds), as well as sun tunnels for routing light through interior walls.
Each type demands different waterproofing methods and building code compliance for your property.
Materials and Methods
A proper skylight installation includes these components and labor steps:
- The skylight frame (VELUX, Solatube, or similar branded units)
- Rough opening cut into the roof deck and sheathing
- Support framing at rafters and joists
- Ice-and-water shield or synthetic underlayment for moisture protection
- Flashing and counter-flashing to channel water away
- Step flashing where the frame meets asphalt or architectural shingles
- Drip edge to direct water into the gutter system
- Sealant, roof cement, and caulk to seal all joints
- Insulation around the frame for energy efficiency
- Vapor barrier for moisture control
- Ring-shank nails to secure shingles and prevent back-pull in Chicago wind
The work involves removing existing shingles and inspecting the roof deck for rot or decay. We install the skylight with fasteners and waterproof every edge. Proper substrate preparation prevents long-term leaks.
We use roof cement, adhesive, and sealant methods that match Chicago's freeze-thaw cycles. Ridge cap ventilation remains intact to prevent condensation buildup. All debris is collected in a dumpster for safe removal.
Cost and Timeline
Skylight installation in Chicago typically ranges from $2,000 to $6,000 depending on frame type, size, and roof pitch. Labor takes one to two days. A free roof inspection helps us estimate accurately and assess your roof structure, rafter spacing, and existing conditions.
Warning Signs You Need Skylight Installation or Repair
- Water stains on the ceiling or drywall below an existing skylight frame
- Visible rot or decay around the roof opening or decking
- Flashing that is corroded, dented, or missing sealant
- Interior condensation or fogging in the glass during freeze-thaw cycles
- Daylight visible around the frame edges—a broken seal
- Dark rooms relying on daytime electric lighting (new skylight consideration)
- Ice dam formation around the skylight during Chicago winters
- Energy bills that would benefit from natural daylighting
Our Installation Process
- Roof Inspection and Measurement — We assess your roof pitch, deck condition, rafter and joist spacing, and existing shingles (asphalt, architectural, or specialty types). We verify building code requirements and measure the opening for proper flashing and insulation fit.
- Rough Opening — We cut the roof opening carefully, removing shingles, underlayment, and sheathing using a roofing shovel and pry bar. We inspect the decking for rot and reinforce framing at rafters. All debris is removed immediately.
- Flashing and Waterproofing — We install ice-and-water shield around the opening and position the skylight frame securely. Step flashing and counter-flashing are sealed with roof cement and sealant to block water intrusion. This is the most critical step—most leaks start here.
- Shingles and Sealing — We re-nail surrounding shingles, apply sealant to all edges, and verify drainage into the gutter system. Drip edge is checked for proper water direction into downspouts.
- Interior Finishing — We install insulation and vapor barrier around the frame opening. Motorized blinds or venting systems are tested and adjusted for operation.
- Final Inspection — We inspect from inside and outside, verify flashing integrity and sealant cure, and walk through the completed installation before you accept the work.
Local Chicago Weather Considerations
Skylights in Chicago must withstand heavy snow load, ice dams, and Lake Michigan wind gusts. Our flashing and counter-flashing are sized for the steep-pitch roofing common in Chicago neighborhoods—Wicker Park, Lincoln Park, Pilsen, Bridgeport, Logan Square.
We ensure roof ventilation (soffit vents, ridge vents) is maintained to prevent condensation during winter freeze-thaw cycles. Ice-and-water shield is non-negotiable on Chicago roofs due to ice dam formation. We account for summer thunderstorm damage from hail and wind uplift, which affects flashing durability and sealant integrity.
Warranty and Insurance
We warrant our workmanship for 5 years. The skylight frame carries a 10-year manufacturer warranty. We are licensed, bonded, and insured. We assist with homeowner insurance claims for weather-related damage to your skylight or roof.
Frequently Asked Questions
What if my roof has metal panels or slate tiles instead of asphalt shingles?
Metal roofing, standing-seam panels, and slate or tile require specialized flashing and fastening methods. We have experience with all roof types—asphalt, metal, tile, cedar shake. Building code requirements differ by material.
Will a skylight cause condensation in winter?
Modern skylights have insulated glass and thermal frames that minimize temperature difference. A vapor barrier and proper ventilation prevent interior condensation. Winter humidity levels and soffit vent placement matter too.
What's the difference between fixed and vented skylights?
Fixed skylights are stationary and provide light only. Vented skylights have motorized or manual blinds and can open for ventilation. Vented units cost more but offer summer heat relief and better moisture control.
Does a skylight void my roof warranty?
No, if installed by a licensed roofing contractor. Improper installation can create leaks affecting surrounding shingles and decking. Our installation method preserves your roof warranty and protects the surrounding roofline.
How do you prevent leaks in heavy rain or snow?
Proper step flashing, counter-flashing, ice-and-water shield, and sealant create a complete waterproof seal. Chicago's heavy snow demands flashing overlap extending 4-6 inches beyond the skylight opening to handle water wicking and runoff.
What's Included
- Skylight frame installation (VELUX, Solatube, or equivalent premium brand)
- Roof deck assessment and framing reinforcement at rafters and joists
- Ice-and-water shield, flashing, step flashing, and counter-flashing installation
- Sealant, roof cement, and weatherproofing caulk for all joints
- Insulation and vapor barrier around the frame
- Shingle removal, reinstallation, and edge sealing
- 5-year workmanship warranty and 10-year manufacturer frame warranty
- Complete debris removal and site cleanup
Our Skylight Installation Process
- Roof Inspection and Measurement — We inspect your roof pitch, deck condition, rafters, joists, and existing shingles. We verify building code compliance and measure the opening for proper flashing and insulation fit.
- Rough Opening — We cut the opening in the roof deck and sheathing using a roofing shovel and pry bar. We inspect the decking for rot or decay and reinforce the framing. All debris is removed immediately.
- Flashing and Waterproofing — We install ice-and-water shield around the opening, position the skylight frame, and secure it with ring-shank nails. Step flashing and counter-flashing are sealed with roof cement and sealant to block water intrusion completely.
- Shingles and Sealing — We re-nail surrounding shingles, apply sealant to all edges, and verify drainage into the gutter system. Drip edge is checked for proper water direction.
- Interior Finishing — We install insulation and vapor barrier around the frame opening. Motorized blinds or venting systems are tested and adjusted for smooth operation.
- Final Inspection — We inspect the installation from inside and outside your home, verify flashing integrity, and ensure all sealant is cured before we're done.
Signs You Need Skylight Installation
Signs You Need Skylight Installation or Repair in Chicago
- Water stains on ceilings or walls below an existing skylight frame
- Visible rot, decay, or settling around the skylight opening or roof deck
- Flashing that is corroded, dented, or missing sealant
- Interior condensation, fogging, or ice buildup during winter freeze-thaw cycles
- Daylight visible around the frame edge—a sign the seal is broken
- Dark rooms requiring daytime electric lighting (new skylight consideration)
- Ice dam formation around the skylight during heavy Chicago winters
- Energy bills that would benefit from natural daylighting
Don't just take our word for it — hear from our satisfied customers.
"Chicago Roofing Team installed a skylight in our Lincoln Park living room, and the light completely changed how we use the space. They were careful about the flashing and weatherproofing—no leaks even through a rough winter. Highly recommend them."
— Sarah M., Lincoln Park, Chicago
"Our Pilsen bungalow had an old, leaking skylight from the previous owners. Chicago Roofing Team replaced it with a new vented skylight and solar-powered blinds. The workmanship was clean, and they explained every step. Worth every penny."
— Marcus R., Pilsen, Chicago
"We wanted natural light in our Wicker Park bedroom without replacing windows. A fixed skylight was the perfect solution. Chicago Roofing Team handled the roof deck assessment and installation professionally. It's been two years with zero issues."
— Jennifer L., Wicker Park, Chicago
Ready to get started? Call us today at 3123133253 for a free estimate.
Free estimates · Licensed & Insured · 25-year warranty
Call 3123133253